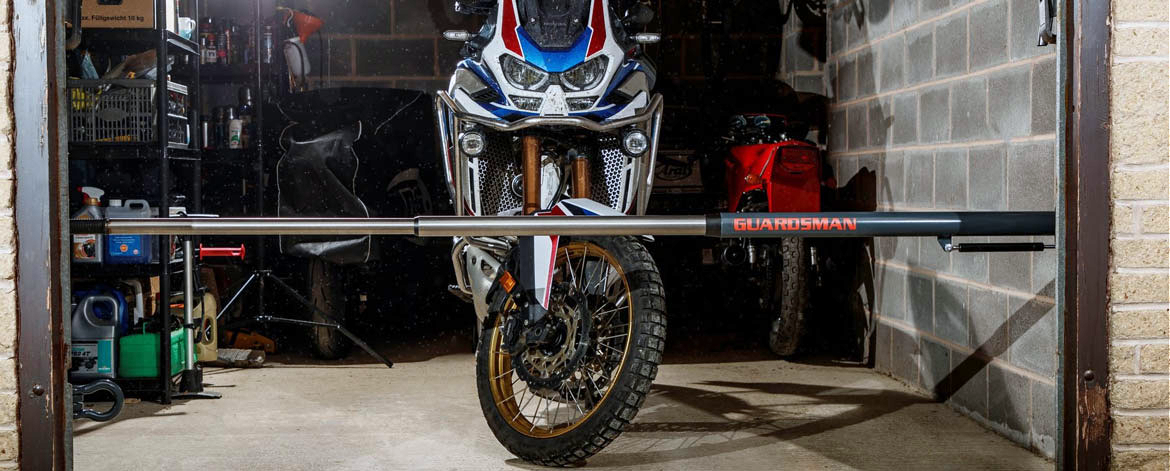
Go the extra mile for security
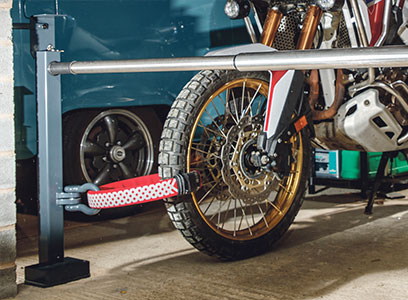
A telescopic security device like this Guardsman is an internal barrier that sits behind your garage door at a height low enough to prevent thieves from wheeling your bike away. Read the instructions and check the contents to get a sense of how it all fits together before you begin. Then assess the installation location.
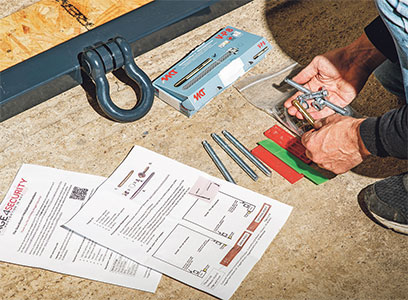
Use the packaging as a template
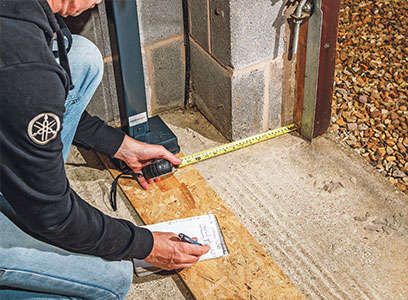
Most suppliers will charge you around £100 for fitting but you can do the job yourself. In this case, the barrier’s wooden packaging is used as the template for the holes that need to be drilled to locate the two posts. Lay the template down in the location and start measuring the distances between the walls and the garage door frame, checking for any clearance issues.
Time to fire up the drill
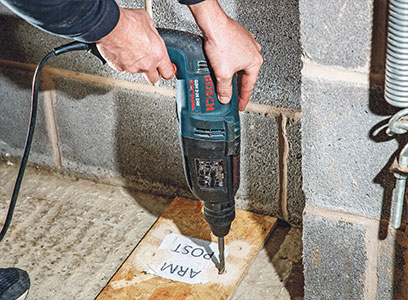
Once the template is in place you can mark the holes for where the posts will secure to the garage floor. Each post has four holes and each one needs drilling in stages. The first stage is to drill using a 12mm bit lightly to initially mark the holes, then remove the template and next drill 8mm pilot holes followed by the final 12mm drill bit for the full locating hole.
Check you are drilling to the right depth
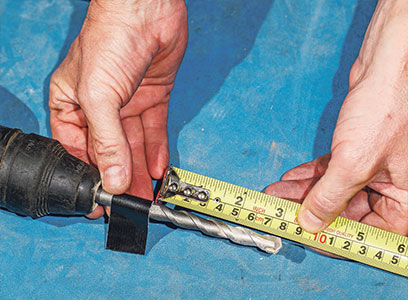
The holes need to be drilled to 80mm. If you drill hasn’t got a depth gauge, use a piece of tape around the drill bit measured at the correct distance. It’s worth mentioning that drilling through a concrete floor is out of the range of most regular hammer-action DIY drills so you’ll need to hire an SDS hammer drill with the correct sized bits, usually for around £25 per day.
Bust out the dust
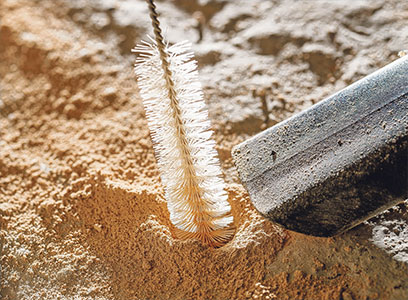
When drilling, use a vacuum cleaner along with a hole brush to clean out all of the debris. It’s essential that this is done because the debris will settle to the bottom of the hole and compromise the depth, potentially unsettling the anchoring bolts. Recheck the depth when you are finished.
Insert the resin
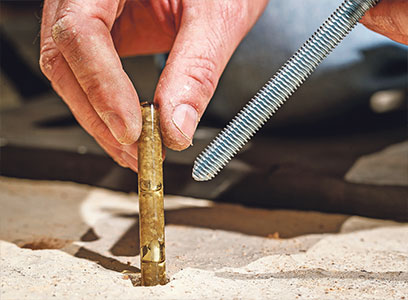
The posts are held by threaded steel bolts secured by a resin capsule. Place the capsule into the hole followed by a bolt. Turn the bolt until the capsule breaks then use a drill set to low speed to help spread the resin. Once the resin is level with the floor, stop spinning the bolt with the drill.
Consult the spirit world…

Place the posts on the studs, then bring down the barrier arm to make sure it fits. Leave it in the down position for 24 hours for the resin to cure. After this time, check the post with a spirit level and correct using the shims provided in the kit. Tighten the bolts in sequence in conjunction with any shimming required, as you do so make sure the barrier still locates securely.
Tighten up the security nuts

As an added layer of security, the nuts that secure the post into the floor have heads which shear off to prevent thieves (or anyone else for that matter) from easily unbolting them. Tighten up the post nuts in a diagonal pattern and then as they reach the pre-determined torque the nut head will break off. Be careful not to skin your knuckles as they do so.
Tether the posts to the garage wall
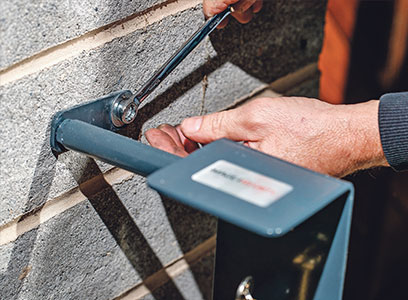
To fix the post to the wall, unwind the wall bracket then mark its location lightly with a drill as before. Drill a hole 55mm deep using a 12mm SDS drill bit. Clean the dust and debris away and then secure the bracket with the supplied anchor bolts. Check the action of the barrier arm then fix the other post to the wall in the same way.
Finishing touches
Clean around the base of the posts making sure they’re free from dust, then touch up any areas that you might’ve accidently scraped in the process with the correct paint. Fit the floor cover with the Allen bolts, before finally fitting the lock into the post before ideally leaving the barrier locked in position for a further 24 hours for the post bolts to completely cure.


